
Table of Contents
EXTERIORVIBE.BIZ.ID – The Steam Deck offers an incredible portable gaming experience, but sometimes you desire the immersion of a larger screen. Connecting your Steam Deck to a TV or monitor allows for a more expansive view and often better local multiplayer opportunities. This guide will walk you through the simple steps to get your Steam Deck up and running on your television.
Why Connect Your Steam Deck to a TV?
Connecting your Steam Deck to a TV unlocks new ways to enjoy your game library. You can transform your portable device into a full-fledged console, perfect for sharing games with friends or appreciating detailed graphics. Enjoying games on a larger display significantly enhances visual fidelity and overall immersion for many titles.
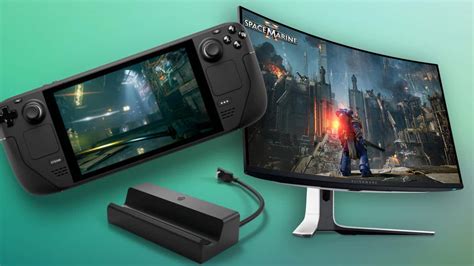
Essential Equipment for TV Connectivity
To connect your Steam Deck to a television, you will primarily need a few key items. A USB-C to HDMI adapter or a dedicated docking station is crucial for video output. You will also need a standard HDMI cable to bridge the connection between the adapter/dock and your TV.
While optional, an external controller (like a PlayStation, Xbox, or Steam Controller) significantly improves the TV gaming experience. Consider a wireless keyboard and mouse if you plan to use the Steam Deck’s Desktop Mode on the big screen. Ensure your Steam Deck is sufficiently charged or connected to its power supply.
Step-by-Step Guide: Connecting Your Steam Deck to a TV
The process of connecting your Steam Deck to a television is straightforward and can be completed in just a few minutes. First, ensure your TV is turned on and ready to receive an input signal. You should also ensure your Steam Deck’s battery has enough charge or is plugged into its charger.
Begin by connecting your USB-C hub or docking station to the Steam Deck’s top USB-C port. This port is the primary connection point for both data and power passthrough. Next, take your HDMI cable and plug one end into the HDMI output port on your dock or adapter.
Then, connect the other end of the HDMI cable to an available HDMI input port on your television. Make a note of which HDMI port you use on your TV (e.g., HDMI 1, HDMI 2). Switch your TV’s input source to the corresponding HDMI port you just connected.
Finally, power on your Steam Deck if it isn’t already, and you should see its display mirrored on your television. The Steam Deck automatically detects external displays and adjusts its output accordingly. If the display doesn’t appear immediately, try restarting your Steam Deck or cycling through your TV’s input sources.
Optimizing Your Big Screen Experience
Once connected, you might want to adjust some settings for the best experience. Navigate to the Steam Deck’s Display settings to tweak resolution and refresh rate if needed. Most TVs will work best at 1080p or 4K, depending on your dock’s capabilities and TV’s support.
For comfortable gaming, pair your preferred wireless controller with the Steam Deck via Bluetooth. This setup provides a traditional console feel, letting you relax on the couch. You can also switch to Desktop Mode for web browsing or other PC tasks on your TV.
Troubleshooting Common Issues
Occasionally, you might encounter minor hiccups when connecting your Steam Deck to a TV. If you see no signal, double-check all cable connections and ensure the TV is on the correct input source. Sometimes, simply unplugging and re-plugging the HDMI cable can resolve display issues.
If the resolution looks incorrect, access the Steam Deck’s display settings and manually select an appropriate resolution and refresh rate for your TV. Ensuring your dock or adapter is receiving sufficient power can also prevent connectivity problems. Update your Steam Deck’s software regularly, as updates often include compatibility improvements.
Connecting your Steam Deck to a TV is a simple and rewarding process, significantly expanding your gaming horizons. With the right accessories and a few easy steps, you can enjoy your favorite Steam games on the biggest screen in your house. Dive into a more immersive gaming experience today!
Written by: William Clark